How To Create A Six Figures Shopify Store (Step By Step) | Tutorial For Beginners
Shopify is one of the best and user-friendly ecommerce website builders in the world.
Using their service, you can get access to easy to use admin panel where you can add products, use their shopping cart solution to sell, ship, and manage your products, process orders, and collect store data.
But if this is your first time using Shopify, or your first time building a website entirely, there is a learning curve.
In this guide, I’ll show you how to use Shopify so you can launch your online store as soon as possible.
So, Let’s get started…
- Plan Your Store Before Launching
- Choose Your Store’s Name
- Signing Up with Shopify
- Set Up Your Online Store
- Choose a design for your store
- Optimize Your Store’s Settings
- Create Your Essential Pages
- Add your products
- Create Your Collections
- Know Well To Your Orders Page
- Add These Recommended Apps
- Add a domain name
- Choose A Paid Plan
Total time to create an online shop using Shopify: ~1-2 hours
Skill level: Beginner
1) Plan your Store Before Launching
Before you even open your laptop to work, there are a few questions you should answer.
The questions:
- Are you opening solo or with a business partner?
- If it’s with a partner, how will you split up the work? What about the profit?
- If you’re in a committed relationship, will the significant other support you work long hours? (If this is a side-hustle on top of a full-time job, it’s not uncommon to work well into the night. If it’s your main job, you’ll likely need financial support as you start.)
Beyond these relationship questions, you’ll also want to determine your goal.
- Do you want this to replace your job, or is it a hobby?
- How much time do you have to spend on this project?
- What about money — do you have a budget to hire a designer, or will you bootstrap? (If you’re bootstrapping, it will require a lot more of your time.)
- How casual or serious do you want the tone of your business to be? What are some companies whose tone you admire? Consider these for your about us page, as a lot of people get hung up on that and it will eat into your hour if you let it!
Write your all answers down or put them in your worksheet.
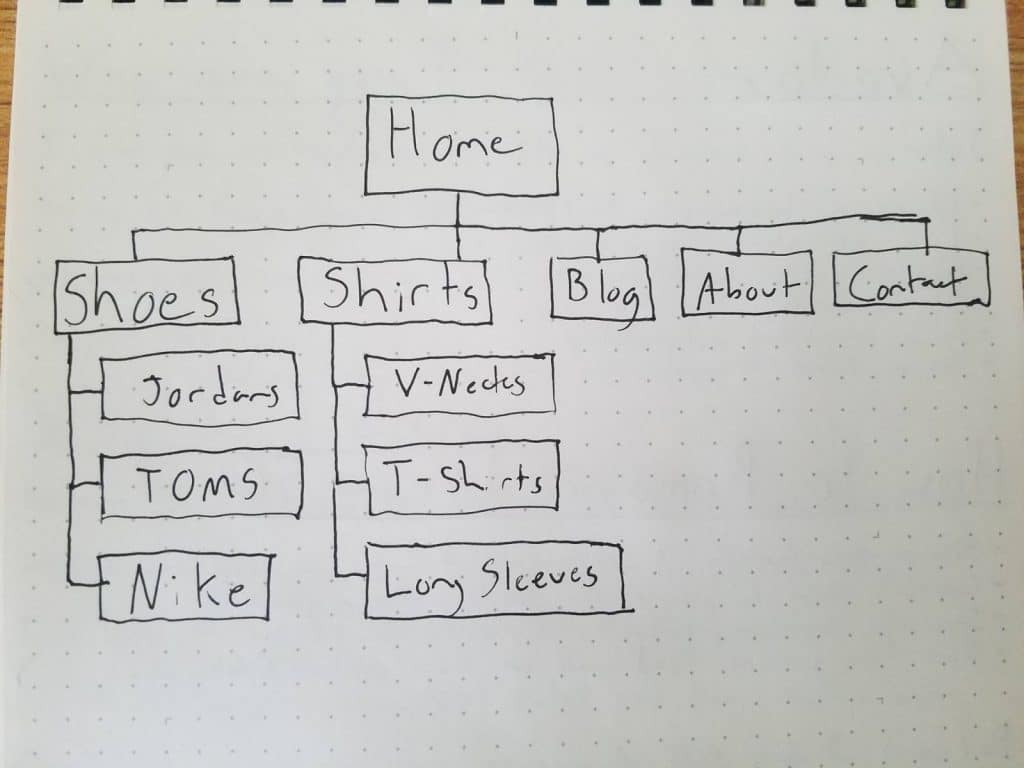
After thinking about the logistics and your goal, the next thing to think about is your product collections or categories. What’s the best way to organize everything?
Create a mindmap, like this:
2) Choose your Store’s Name
Your store’s name is a big deal! It’s your brand; your business’s soul.
Here are some tips on how to name your store:
- Try to keep it short and simple (fewer than 12 characters if possible).
- Make it something easy to remember (and spell).
- Be original (don’t copy another brand name).
Keep your current and future product offerings in mind. Don’t let your name limit you.
Say you’re selling matcha tea. “Simply Matcha” sounds like a great name, right? It’s short, easy to spell and remember, and original.
What happens when you branch out into selling other kinds of tea? Your brand name is suddenly limiting you.
I’m not saying you can’t have a name like this. Just make sure if you do go with a name like this you’ll still sell “simply matcha” in five or even 10 years. You can always rebrand, but that’s not an easy process.
3) Signing Up with Shopify
Visit Shopify. Use the signup form to create an account.
Enter the required details and click the ‘Start free trial’ button.

After this initial screen, you’ll be asked for a few more details, including your name, address, country, and contact number.
You will also be asked if you have products and, if so, what you aim to sell. If you’re just trying out Shopify to see if it works for you, you can select ‘I’m just playing around’ in the ‘Do you have products?’ dropdown, and ‘I’m not sure’ in the ‘What will you sell?’ section.
Once complete, click ‘I’m done’.
4) Set Up your Online Store
After you’ve signed up, you’ll be directed straight to your store admin screen. Now you are ready to start customizing your store, uploading products, and setting up payments and shipping.
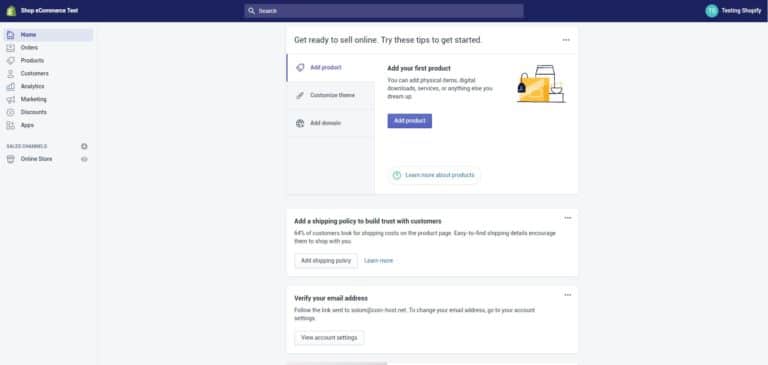
Your home admin screen tells you all you need to know to get you up and running.
5) Choose a Design for your Store
Shopify has its own official theme store. These themes are all guaranteed to have full support from the designers so you know that your store is in good hands.
All themes come with a comprehensive list of modifications you can make without having to touch a line of code.
The premium themes come with more modifications, but you can also achieve a great looking site with a free one. These changes are outlined in the next section.
If you want to make wholesale changes to a theme, there are very few limitations on what can be achieved by accessing the HTML and CSS.
Don’t worry if you haven’t got any coding experience. Shopify has an international team of design agencies they call ‘Shopify Experts’ that you can hire to fully customize your site.
To find a theme that suits your needs, you should do the following:
1. Browse the Theme Store
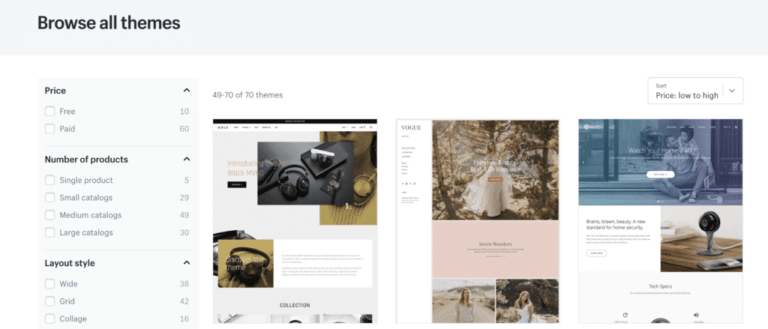
Log into Shopify and visit the Shopify Theme Store at themes.shopify.com. You’ll find over 70 theme variations to choose from, including a good selection of free ones.
You also could find Shopify themes on other Marketplaces, like TemplateMonster one. Just choose, category, features to pick your theme.
You can filter by paid or free, industry, and features. You can also sort themes by price, popularity, and most recent.
2. Check the Functionality and Reviews
Once you’ve found a theme you like, click on the theme’s sample image.
You’ll be given more information about the theme, such as whether the theme is responsive/mobile ready among other features.
Scroll down to read some reviews about what other e-tailers using the theme think of it.
3. Preview the Theme
To see the theme in action, click View Demo. You’ll see this below the green ‘Preview Theme in your Store’ button.
If the theme comes in a range of styles, you can also view demos of the different styles by clicking on them.
4. Get the Theme
Once you’ve found a theme you like, click the green button.
Shopify will ask you to confirm that you want to install the theme.
Click Publish as my Shop’s Theme.
Don’t worry if you’re not 100% sure it’s the right theme for you. You can always change your mind later.
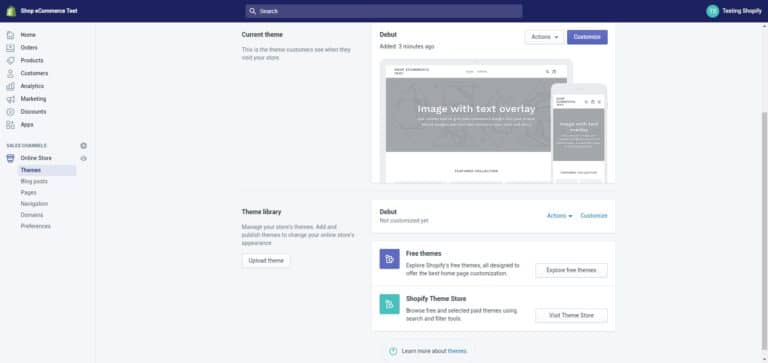
After the theme has installed, Shopify will let you know and will give you the option to Go to your Theme Manager.
Your theme manager shows published themes (the one you installed or activated most recently) and unpublished themes below (previously installed themes).
Recommended Themes
To help you save time so you don’t have to wade through hundreds of themes to find one you like, here are some themes I recommend; some are free, some are paid. I prefer a minimalistic design since they’re easy to edit and look great with minimal effort.
i) Minimal
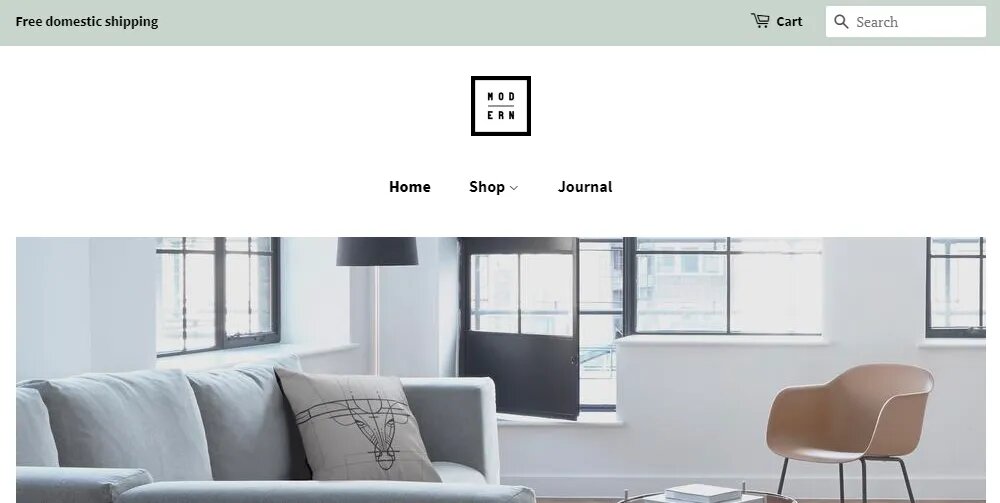
Cost: Free
Like its name, this is a minimalistic theme with few bells and whistles. It’s clean, easy to use, and looks darn good. More is often less and that’s why I love this theme.
ii) Startup

Cost: $180
Startup is a clean, modern theme. It’s ideal for single-product stores or stores with only a few products. It’s flexible, fast, and responsive.
iii) Symmetry
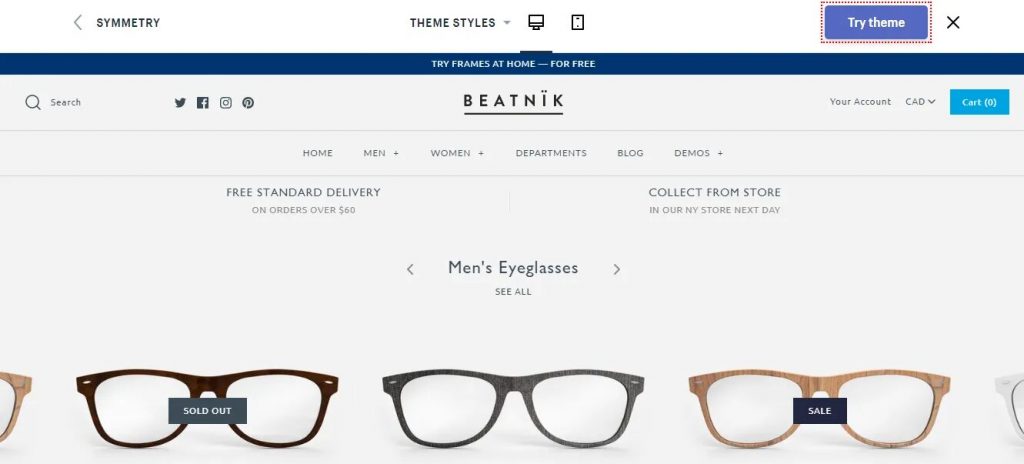
Cost: $180
If you have lots of products to show, the Symmetry theme is your friend. You can easily show off lots of collections and items
6) Optimize your Store’s Settings
While Shopify’s default settings are great, there are some things to add and change to make the most of your shiny new store!
Let’s walk through it step-by-step. Start by clicking the Settings button at the bottom left of your dashboard.
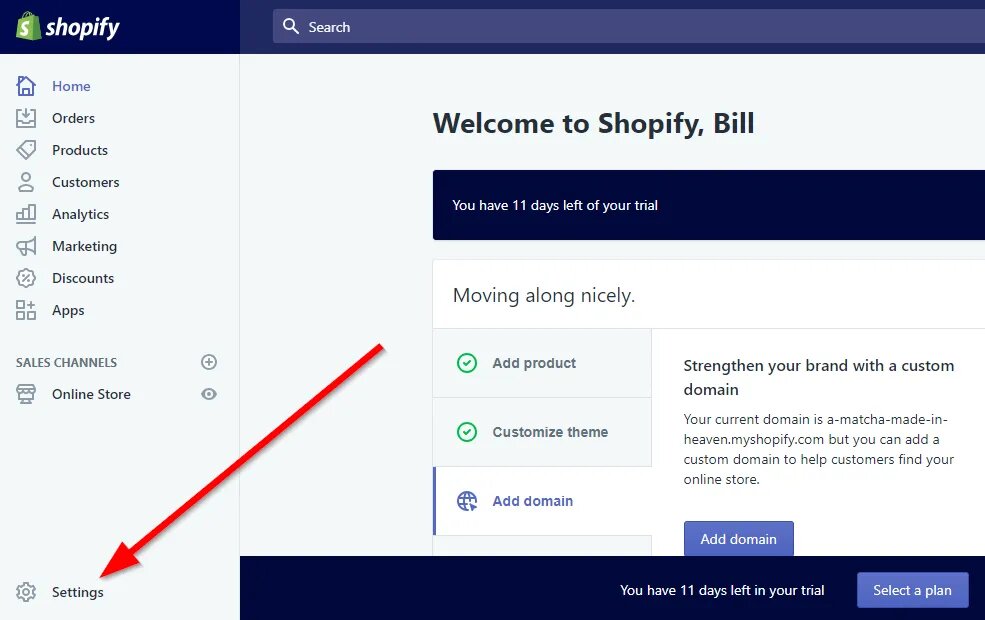
General Settings
Here you can edit your store name, email, store address, and more. If you change your store name after signing up, update it now.
The Account email is the email Shopify will contact you through (customers won’t see this email). The Customer email is the email customers will contact you through.

Enter the Legal name of your business if you have one, and edit your address if needed.
Next up is the Standards and formats section, where you set your timezone and standard information like weight units. In the Prefix box, I like to add something in case I open multiple stores. I usually make this the abbreviation of my store’s name.
Don’t forget to click Save!
Payment Provider Settings
In the payment provider settings, click the Complete account setup button to configure your payment gateway so customers can use credit cards to purchase.
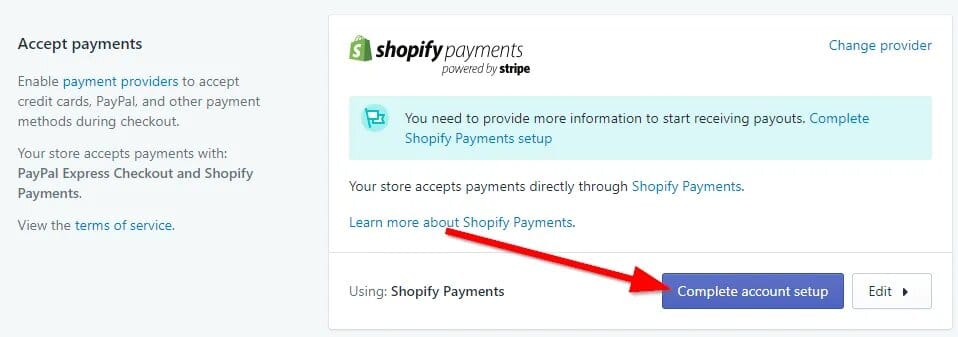
Fill out everything on this page. For the Product details box, write “Retailer of [your product category here]”.
Next, Statement Descriptor is what your customers will see on their billing statement. Make this your store or company name.
Fill out the remaining information and click Complete account setup.
PayPal should be set up automatically by Shopify. If not, set it up now. You can add other payment providers later, such as Apple Pay, but it’s not necessary now.
Checkout Settings
Under your checkout settings, switch Customer accounts to “optional,” and customers can create an account but aren’t required to.

Next to Form options, check “Require first and last name.”

Finally, Email marketing, I recommend checking “Preselect the sign-up option” to market to more of your customers.

Check out the remaining settings on this page and make sure they’re to your liking.
If you’ve set up Google Analytics or your Facebook pixel, add your custom conversion code in the Additional scripts box.
If you haven’t, there’s a video guide for doing this in the Preferences section of this post.
When you’re done, click Save.
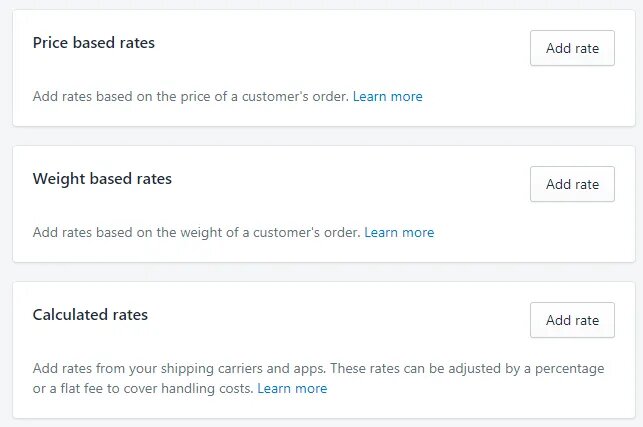
Shipping Settings
Your shipping settings depend on how you ship.
If you’re dropshipping: Use “Price based rates.” Someone with a $10 order can pay one rate, and someone with a $30 order can pay a different shipping rate.
If you’re shipping items yourself: Use USPS’s Discounted rates for Shopify stores; it calculates shipping for you so your customer pays what it costs you to ship. (For this to work properly, have the correct size and weight entered on your product pages.)
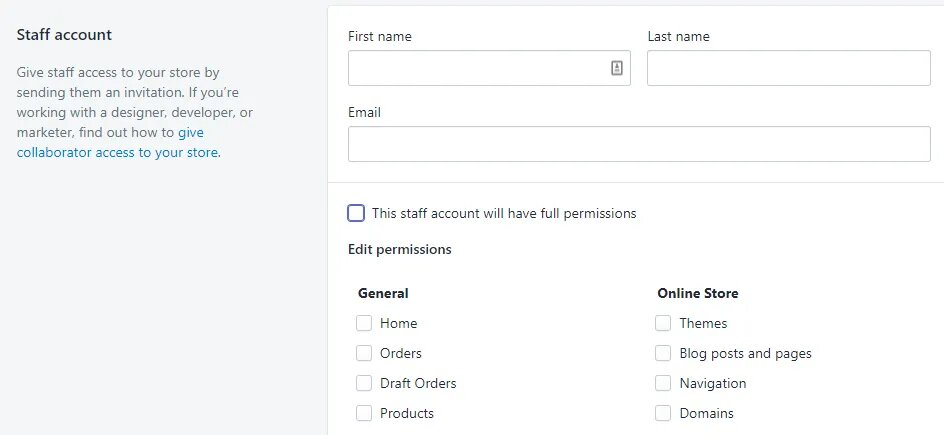
Account Settings
If you have a partner or a virtual assistant, you can give them an account on this page. Click Add staff account and choose what you want them to have access to.
Legal Settings
This is an important setting. Without it, you’re operating illegally.
Every online store needs a Refund Policy, a Privacy Policy, and a Terms of Service (ToS) Agreement.
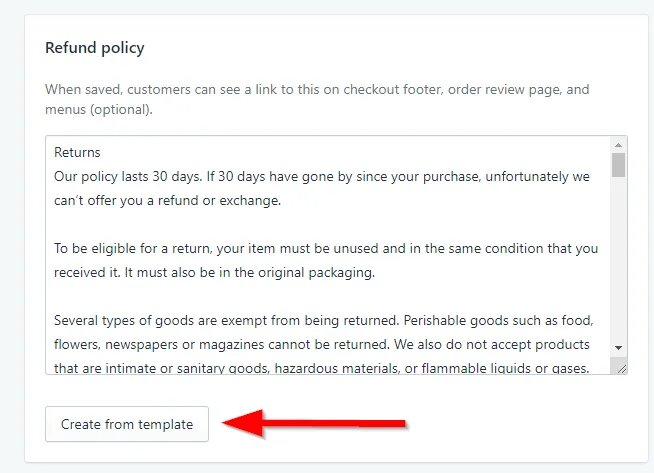
Luckily, Shopify can generate one for you based on your settings. Again, remember we are not lawyers and this is not legal advice. Once your store starts generating revenue, I recommend having an attorney review these documents for you.
Simply click the three Create from template buttons under each section.
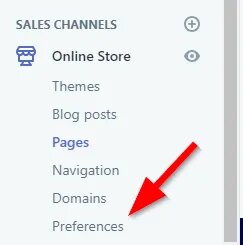
Next, create pages for each document. Right-click Online Store and open it in a new tab (so it’s easy to copy and paste from the Legal settings page).
Under Online Store, click Pages then Add page.

Title the first page “Refund Policy”. Go back to your legal settings tab and copy the entire refund policy, then paste it into the new Refund Policy page in the other tab. Click Save. Repeat for your “Privacy Policy” page and “Terms of Service” page.
Preferences
This is the only setting not under the “Settings” page; instead, go to Online Store > Preferences.
First, edit your store’s meta title and description (the text that appears in the search engines).

Here are some tips for your meta:
- The max title length is 60 characters; the max description is 160 characters.
- Add your keyword in the title and description.
- Think like a copywriter. Would you click this link if you saw it after searching for your product?
Next, if you have it set up, add your Google Analytics tracking code. If it’s not set up, watch the quick video below to learn how it’s done.
Next, you’ll see the Facebook Pixel ID section; the video below explains the process.
7) Create your Essential Pages
Now that your settings are configured, there are four more pages every ecommerce store should have:
- A Contact Us page
- An About Us page
- A Shipping Policy page
Contact Us Page
Creating the contact page is easy. Click Add page, then in the drop-down menu under the Template section, choose “page.contact”.
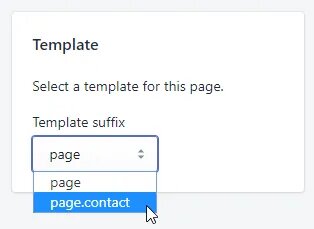
You can leave it like this, but I prefer to add some explaining text.
You want to touch on what they can talk to you about, how long a response could take, and an alternative way to contact you (like a phone number) if you have that option. If not, just the form is fine.
When you’re done, don’t forget to Save.
About Us Page
Having a great about page is one of the best ways to build trust with your customers, talk about why you started your store, and share more about who you are.
It’s also a great way to stand out since most Shopify stores’ about pages suck.
Shipping Policy Page
Help your visitors understand how long shipping will take, if your store sells internationally, who will deliver their package, and how to track their purchase.
You’ll get fewer customer service questions (be sure you make this page easy to find).
This page is especially helpful if you’re dropshipping from overseas and have long shipping times (like 10+ days).
Click Add page like before, then create a shipping policy.
Adding Your Pages To Your Menu Navigation
You’ve created all your important pages, now show them in your site’s navigation by clicking Online Store > Navigation.
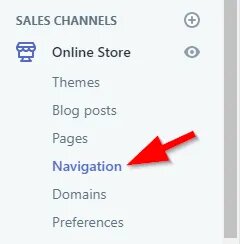
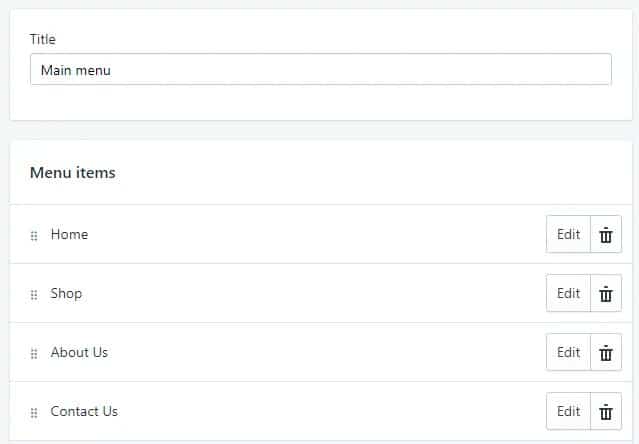
Click Main menu to edit your main navigation menu that goes on the top of your site. To add a page, click Add menu item, then Pages > Contact Us (or whichever page you’re adding).
Repeat if you want your About page and your Shipping Policy page in the main navigation. When you’re done, it should look something like this:
Return to your navigation settings and click Footer menu. Add the Terms of Service, Privacy Policy, Refund Policy, and Shipping Policy that you made in step five (if you didn’t already add them to your main menu).
Preview your site with the eyeball button; you should see the navigation links you added.
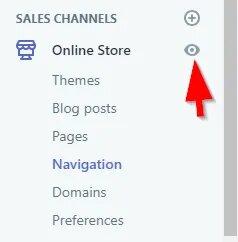
Click each one to make sure it’s going to the right place, then go back to your dashboard to add your first product.
8) Add your products in store
Now it’s time for the fun part — adding products!
To add a product to your store, click Products, then Add product.

Title & Description
Enter your product’s title and description. In your description, I recommend talking about the Benefits of your product first, the features second.
People buy based on emotion and need. They don’t buy because something is “made of titanium”, they buy because they want something that’s long-lasting.
Images
Images are extremely important in selling a product online. If your images suck, you’ll lose credibility and sales.
Organization
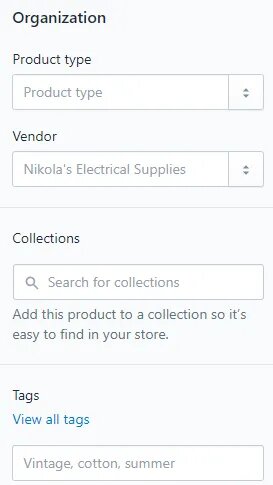
Product type is the type of product (i.e., phone, tea, toiletry, etc.) you sell. Product types are one way to create product collections, which we’ll talk about in a second.
Vendor is used for shipping and inventory purposes. Unless you’re integrating a vendor API, you don’t need to worry about this. (If you don’t know what that is, you don’t need to worry about this.)
The Collections settings allow you to manually add this product to a collection of products, helping customers browse your inventory.
Tags are a way to organize products into collections and improve your site’s search function.
Pricing
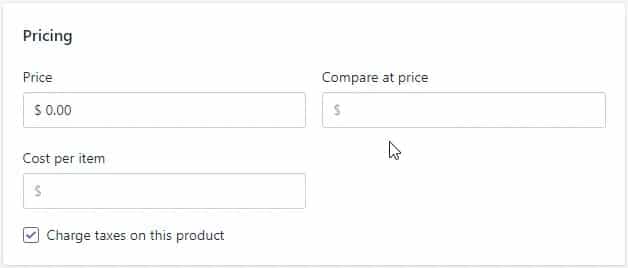
Pricing is straightforward. Your Price is the price customers will pay. Your Compare at price will be shown crossed out next to your actual price to use price anchoring, a conversion optimization strategy.
Inventory
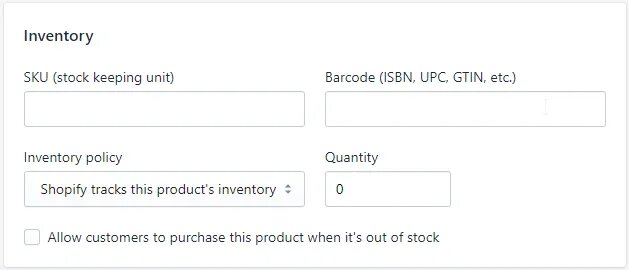
Your inventory settings help with keeping track of inventory (shocking, I know!). You can create a custom SKU for your products if you want. Otherwise, you can leave these settings alone.
Shipping
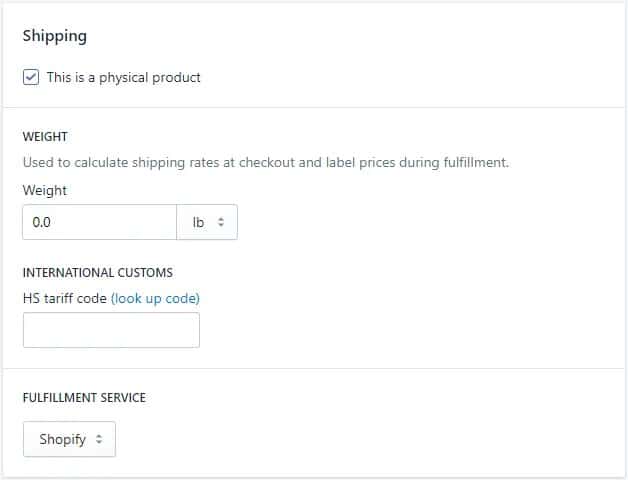
Your shipping settings only need to be adjusted if you’re shipping your products using the USPS Discounted Rates for Shopify. (If you’re not sure if you need this, you probably don’t.) Otherwise, you can leave this alone.
Variants
This is where you add variations of your products like size or color. For example, if you’re selling T-shirts, you can add size (S, M, L) and color (red, green, blue).

9) Create your Collections
A collection is a group of similar products, based on tags, types, vendors, etc. They help your customers find similar products. For example, “Men’s Shoes” could be a collection.
To create one, head over to Collections then click Create collection.

Collection Title & Description
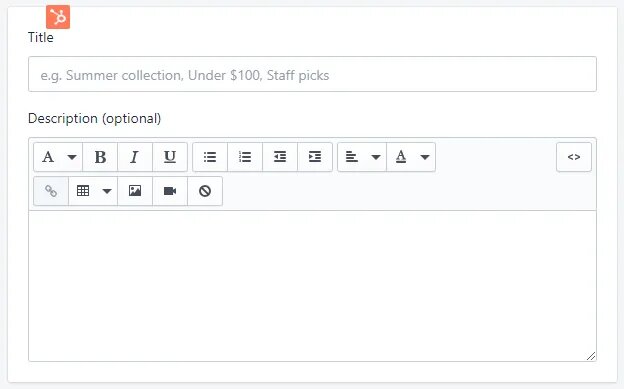
Like product pages, your collection pages also have a title and a description.
However, you don’t need a description. It’s just a paragraph that shows up above your products.
It can help with SEO, but can also be a distraction. It’s best to do this once you have at least two products in a collection.
Manual Vs Automated
You can manually add products to your collections by clicking the collection, searching for the product under the Products section, and selecting the products to add.
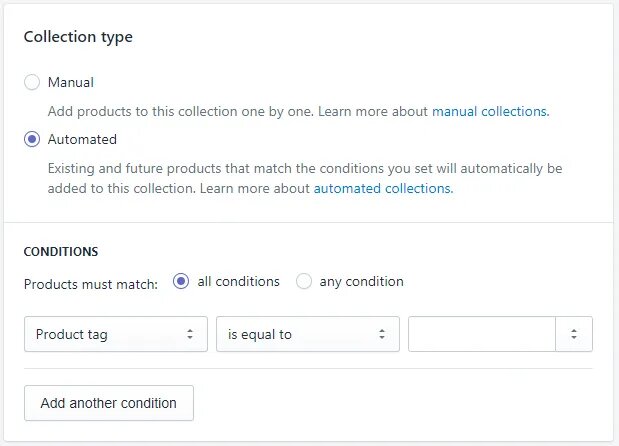
Alternatively, you can automatically add products by setting the Collection type to “Automated” and set the conditions to what you want.
10) Know Well to your Orders Page
To manage your orders and fulfill them, you have to go to the Orders page.
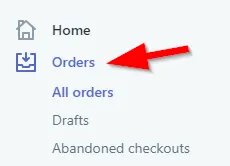
Note that you can’t see this page until you select a plan for your store. You still get 14 days of your free trial, but once you select a plan, it expands what you can do and you’ll be charged after 14 days.
On the orders page, you’ll see any orders that come in, the customer’s details (address, item purchased, etc.) and order’s status. After an order has shipped, you’ll need to update the order to “shipped”.
11) Add These Recommended Apps
Apps are software you can download that add functionality to your store, like customer reviews or discount pop-ups.
Some are free, some are paid. There are thousands of them. But here are four apps I highly recommend you get right now:
Oberlo
Cost: Free
If you plan on dropshipping from AliExpress, the Oberlo app will automatically add products to your store right from your chosen merchant.
It will also automatically place your orders with the chosen vendors whenever a customer orders from your store, saving you a lot of time and effort.
Crush Pics
Cost: $5-$20/month based on number of images
Loading speed is important for all websites, but especially for ecommerce sites.
Crush.pics will compress your images automatically when you upload them, speeding up your site and saving you time.
Sumo
Cost: Free or $49/month
Sumo is the easiest and most affordable tool to collect, send, and monetize email subscribers for your business.
The Sumo email marketing tools have been proven to:
- Reduce abandoned carts.
- Grow your email list.
- Increase your average order value.
Yotpo
Cost: Free for 50 orders or fewer per month
Customer reviews are important for building trust with new site visitors and converting them. YotPo makes it easy to get customer reviews that look great on your store.
12) Add a Domain Name
To get your site live you’ll need a domain name. You have two choices.
Firstly you can buy a domain from Shopify and it will be added to your store automatically.
This saves you time, especially if you have no knowledge about hosting a website. These domains typically cost $9-$14 USD per year.
Your second option is to purchase a domain from a third party such as namecheap. These domains start from $7 USD a year.
Here are the steps to put your new Shopify store live on a third party domain name.
1. Add the new domain in Shopify:
In the Shopify admin, on the left navigation go to Settings and then Domains and add your domain name using the ‘Add an existing domain’ button.
2. Update DNS records:
Login to your domain registrar and make the following changes to the DNS records:
- Replace the @ or main A record with the following IP address: 23.227.38.32
- Add or replace the www CNAME with storename.myshopify.com (i.e. your store Shopify link without the HTTP, which you can see on the domains settings page)
3. Remove any storefront passwords:
Otherwise, no one will be able to access your site even when it’s live.
4. Set as primary if relevant:
Whilst in Online Store > Domains, you can choose your main domain by using the drop-down at the top of the screen:

Ensure that you also check the ‘Redirect all traffic to this domain’. This means that traffic to all other domains will be directed to your primary domain. This is crucial for good SEO.
5. Adding other domains:
You can repeat steps 1 and 2 with other domain names you own. All domain names will redirect to the ‘Primary’ domain, which you can change at any time with the ‘Set as primary’ option next to each domain name.
Note that the number of domain names you own has no influence on SEO.
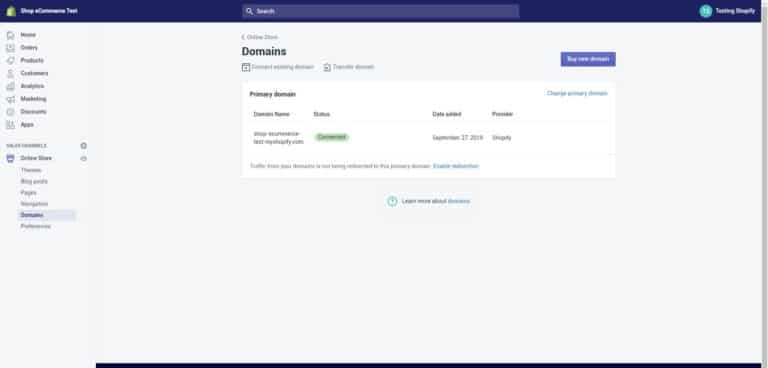
If you have managed that way – congratulations. You should now have a fully working online store.
13) Choose a Paid Plan
You’re almost done!
All that’s left is choosing a plan and removing the password from your store.
Click Select a plan in the bar on the bottom of your dashboard. You’ll see three options:
- Basic Shopify
- Shopify
- Advanced Shopify
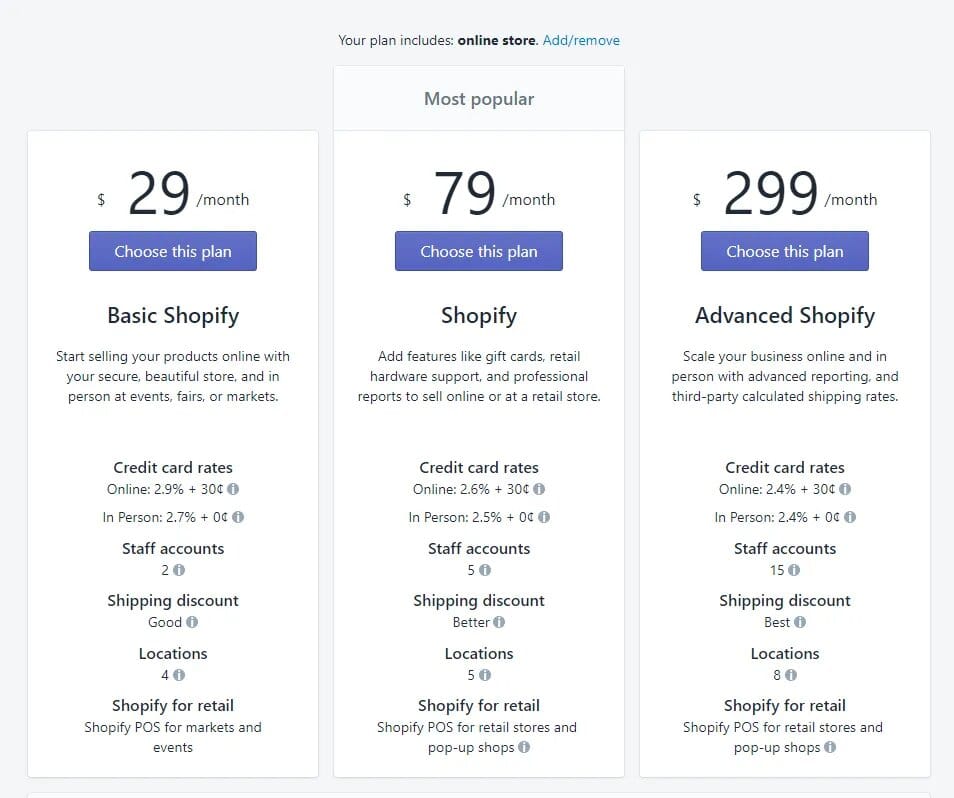
I recommend starting with the Basic Shopify plan unless you know you’re going to have over $20,000 per month in sales.
The main difference between the plans is your cost per sale (2.9% versus 2.6% versus 2.4% of the total) plus $0.30 for each transaction.
Until $20,000 per month, you’re generally losing money on the regular “Shopify” plan if you’re exclusively using Shopify Payments.
Conclusion
If you want to sell both digital and physical products to customers around the world Shopify is the best option for beginners.
If you think it is expensive then you’re wrong. It is better than buying a domain, hosting, and hire a website developer. After that, your total cost will be 1000$ – 1500$.
On the other hand, you could build a website with the help of Shopify in less than 100$ and get a year’s worth of support at once.
If you think it is hefty work then yes. But you will do all the work given in the guide once and get benefited from it.

